How to integrate Grow by Tradedoubler with JavaScript?
Step 1: Prepare for the Integration
Before starting, understand that the codes provided will help track customer journey events, such as account sign-ups (leads tracking) or general points of sale (sales tracking).
Step 2: Insert the “Landing page” JavaScript Script on the Header.
This snipped code is referred to “First-Party Cookie “helps track visitor and remember information about their visit on your website.
Place the code below on every page of the site, including the confirmation page, but excluding any page that displays or processes payment information.

We recommend that you paste it directly after the opening body (<body>) tag to ensure it's present on all pages.

Step 3: Configure the Confirmation Page Script.
Place the provided confirmation page script on the page that loads after a successful customer purchase.

Please ensure that you paste it directly before the closing body (</body>`) tag on the order confirmation page.
Step 4: Replace the Placeholder Data
The data in [brackets] are placeholders – it will need to be replaced with the variable your site uses for the following information:
[ORDER_NUMBER]: is a unique ID or order reference number that should be generated on your end - you need to replace this placeholder text by an actual tag or variable that will automatically inject the respective value on each conversion. This should match the order number your customer receives upon completion of their order.
[ORDER_VALUE]: The total value of the transaction. We use this value to calculate any percentage-based commissions you might have set up for your program. Be aware you also need to replace the placeholder text in the code with the actual tag / variable that passes this data on your website, dynamically injecting a new value on each transaction.
[VOUCHER_CODE]: is the voucher or coupon code that a customer uses during checkout. You need to replace this placeholder text with the actual code, dynamically inserted for each order.
IMPORTANT: Every store is different, and therefore the variable names for the required values differ. If you are using a third-party eCommerce platform, please contact the support team for advice on which variables to use.
Step 5: Conduct Tracking Tests
After integrating Grow by Tradedoubler tracking, you will need to carry a test transaction from the Grow platform to check the tracking is working correctly.
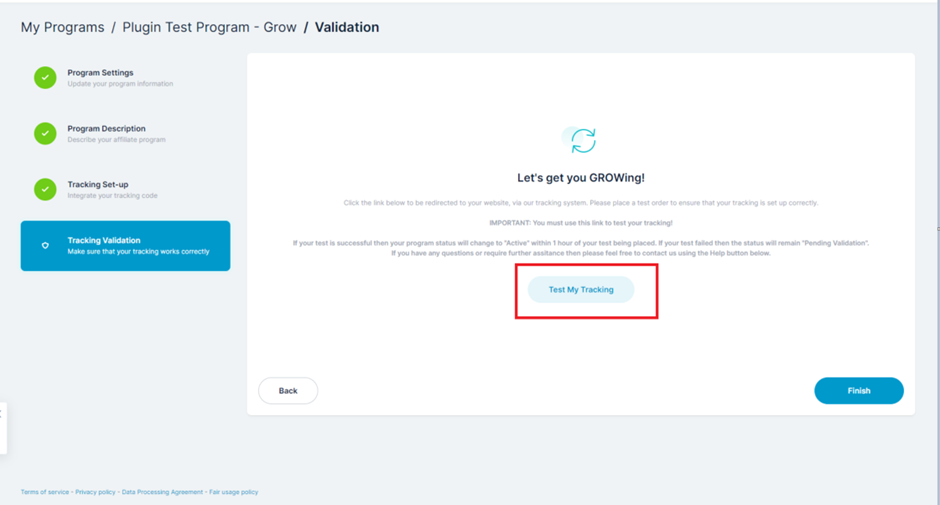
- First, sign-in to your Grow account (https://grow-platform.tradedoubler.com/login), go to the ‘“Tracking Validation’” section (“My Programs > Tracking Set-up > Tracking Validation”).
- Click on ‘“Test My Tracking”' which will redirect you to your store.

- Now proceed to place a real order by purchasing something from your store the same way one of your customers would, I.e., on a normal (non-private) browser, all the way through to payment completion.
If your test is successful, your program status will change to "Active" within an hour of your test being placed. If your test failed, the status would remain "Pending Validation".
By following these steps, you should be able to integrate Grow by Tradedoubler with JavaScript successfully. If your test transaction was unsuccessful, or if you encounter any issues during the process, don't hesitate to reach out to us for support at growsupport@tradedoubler.com.